2 Important Tips!
1. Vertical Surfaces - Children should first begin learning to write on vertical surfaces.
Chalkboards
Dry Erase Boards
2. Top to Bottom - Teach your children top and bottom.
Use various items around the house.
Show them and tell them top and bottom.
Take same items and lay them down in front of your child and repeat showing them top and bottom
BSMART’s Printing Instruction Process... is one of activating brain cells.
At BSMART, we teach beginning printing in a sequential skilled application of developmental tasks that are matched to appropriate stages of physiological development.
Children should start learning to write on a large vertical surface such as a whiteboard, easel, chalkboard, or wall. Letting children use a variety of surfaces also helps provide feedback stimulation through the hands.
Beginning movements should be made starting from very large whole arm movements. In fact, for the first year or so the lines, shapes, or letters should be large and formed by using the entire arm with no bending of the wrist.
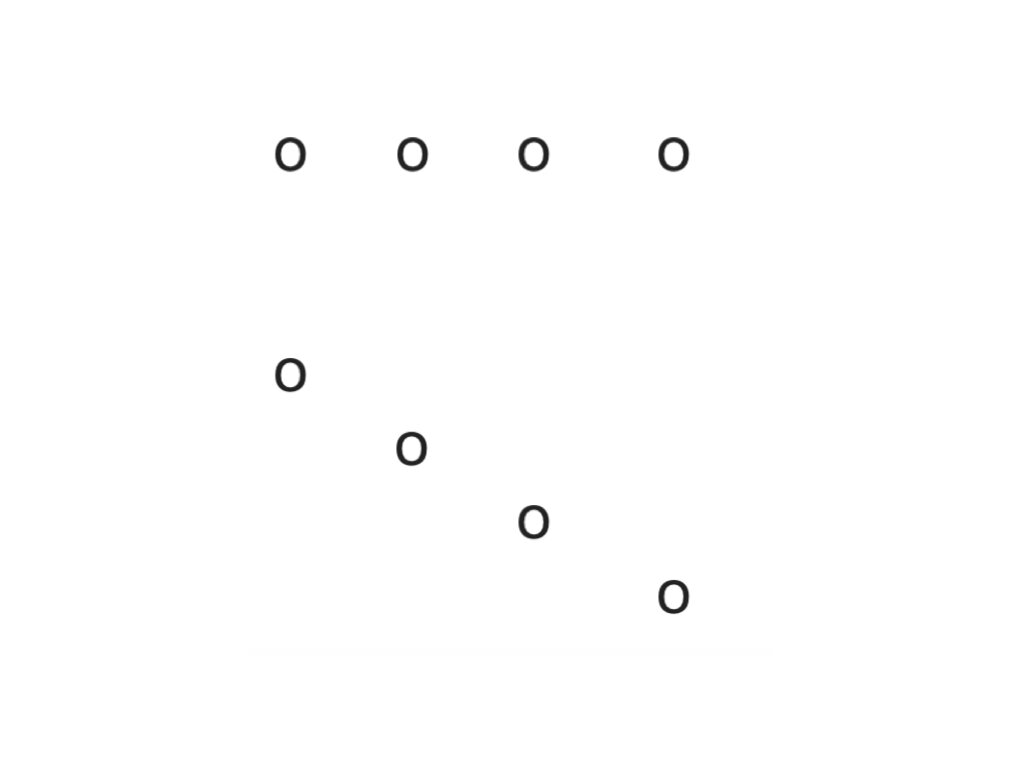
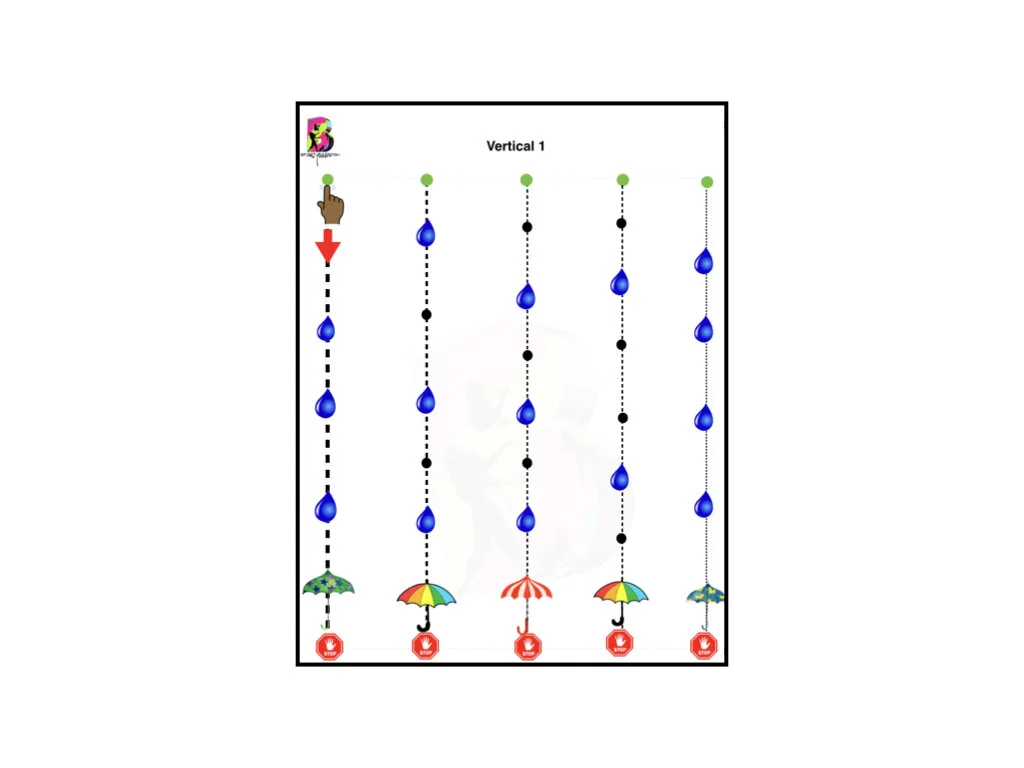
With 2-yr-olds we begin with starting and stopping drawing a vertical straight line many times by making a row of circles o o o o above and another row about an inch below for youngest children.
Once the child has the idea of slow stroke movement move the low row into a downward angle so that the entire arm moves rather than just fingers.

One of BSMART’s vertical chalkboards. We made this by painting a sheet of plywood with chalkboard paint. It needs a couple of coats and to be cured before use.

Tracing
Tracing helps to develop, fine motor control, visual perception, and visual motor integration.
It is more effective than having children copy what they see.
Materials
light table (optional)
tracing paper (optional)
regular paper
dark colored marker
To Do:
If you do not have tracing paper at home you can use a dark colored marker to create shapes and images that can be seen through regular paper.
Old coloring books are useful for premade images.
You can also cover image with wax paper and have your child use a toothpick to trace image underneath.
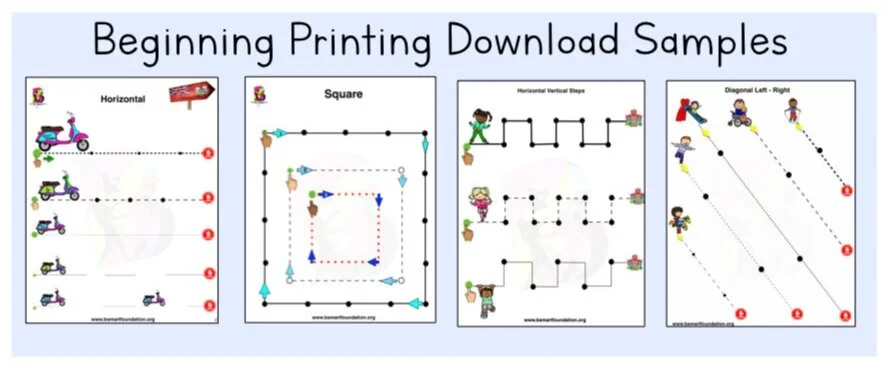
Printing Progression
Vertical Lines
Horizontal
Vertical - Horizontal Patterns (steps). (Overs & Unders -big posters first, then pre-writing overs & unders
Verticals + Horizontals (Cross hatch pattern)
Squares then rectangles
Crosses (diff. For them to know where to start horizontal line)
Curves
Circles
Diagonals
Triangles
Zig Zag vertical
Zig Zag horizontals
Numbers
Letters
Circle Formation
Circles - Around the Track
Developmental skill for correct direction formation for
o, c, a, d, g, q, e, s

One of the important dexterity skills needed to successfully manipulate a pencil with fingers is distal finger control. Without distal finger control, a child uses wrist and forearm motions to move the pencil when forming letters and writing.
The worksheets presented here help to develop distal finger control for use in manipulating a pencil.
I have seen this activity done using reinforcements, but I found it time consuming to stick so many (often non-sticky) little circles onto paper; especially with multiple students.
It would be helpful to enlarge a set to poster size for use on vertical surfaces as well as laminate a set for repeated use with thin dry erase markers.
When forming letters that begin with a circle, have the student start at the 2 o’clock position and draw the circle from top to bottom. Letters like c, o, a, d, g, q, e, and s all have some type of circle motion that is required when learning how to write. Remember to teach these letters all at the same time so students can practice starting the circle at the top 2 o'clock position and continue going around to the left.